
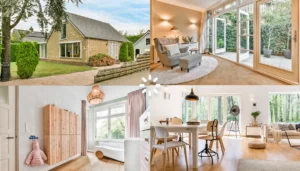

A lot of the image editing we do for our clients is because of the lighting. The photography often comes out too bright or too dark, which leads to the colors being off and unwanted shadows or reflections.
Investing in the right lighting equipment removes much of the recurring frustrations of pictures not turning out how you intended. It will make it easier for you to create photos of professional quality and it will save you time in post-production since you don’t need to edit the brightness in every image.
However, simply splashing money on lamps and accessories is not a guarantee for the desired outcome. First, you need to buy the equipment that best suits your photography goals. Next, it’s vital to set everything up properly so the lighting will make the most impact on your photography.
In this article, we’ll tell you all you need to know about photography lighting, so you’re able to buy the right equipment for your studio.
Table of contents
———–
Photography lighting: all you need to know (and buy)
1) Why is lighting so important in photography?
2) Natural or artificial lighting?
3) Constant lighting or flash?
Constant lighting advantages
Flash advantages
4) Where to place your lighting
Key light
Fill light
Backlight
5) Lighting accessories
Strobes or speedlights
Continuous lights
Modifiers
Reflectors
Light stands and mounts
Background
6) Photography lighting types
Ambient lighting
Diffused lighting
Flat lighting
Broad lighting and short lighting
Hard light and soft light
7) Perfecting your product photography: consider professional editing
1) Why is lighting so important in photography?
You should never underestimate the importance of lighting in photography. Light not only helps to make your image visible, but it gives you various creative possibilities to style your photos. The way colors, texture and atmosphere are captured is directly affected by how you use your lighting.
When we look specifically at e-commerce, lighting can be the defining factor in buying a product (or deciding not to buy). With the right brightness and shadows or reflections, shoppers will have an easier time making a purchase decision because the product looks as good as possible. Furthermore, the quality of your photography positively impacts your trustworthiness as a retailer, which will contribute to more conversions.
2) Natural or artificial lighting?
Often, natural light is the best for photography. But naturally, it’s not ideal to rely too heavily on daylight. You want to be in control.
A large share of photography takes place in a studio environment where you don’t have natural light. You cannot do without artificial lighting, as it’s the next best thing to create an ideal setting for your images.
Your studio must be optimally equipped to replicate natural light. You don’t want your lighting to feel artificial.
3) Constant lighting or flash?
Do you like using a continuous light source for your photography or do you prefer flash? It may not seem that big of a deal, but it does matter for the result. Both have their advantages and disadvantages.
Constant lighting advantages
There are some obvious advantages to using a constant light source. First of all, what you see is what you get, unlike with flash, where you cannot see the result of your lighting until you take a picture. This makes checking and adjusting your lighting so much easier.
Another pro of constant lighting is that you don’t need your camera and lights to ‘talk’ to each other to trigger the flash. This takes some time to set up and can turn out of sync.
Lastly, continuous lighting is not only applicable for photography but for shooting videos as well. Because you can use the same lighting equipment, it will be easier to switch between photo and video content.
Flash advantages
Using a flash for your photography lighting, from a speed light or a strobe, also comes with a set of advantages that make it an interesting option. Lighting from a flash is considerably more powerful compared to using a continuous light source. This is especially handy in a bright outdoor setting, as your flash can overpower any ambient lighting, such as sunlight, to effectively highlight your subject.
Also, a flash allows you to use a way faster shutter speed. This makes it possible to freeze the motion perfectly to create a crisp photo, even when there’s a lot of movement.
What also may give flash the edge over constant lighting is the fact that it’s easier when working with models. As you can imagine, having a bright light constantly shining on you will likely make you squint. By using a flash, you’re sure that your models will look comfortable and have their eyes fully opened.
4) Where to place your lighting
In general, you use multiple light sources together for a photo shoot. Each light, usually three, plays an important role that coincides with its position in relation to the subject. This method is called three-point lighting. We can identify three roles for lighting:
- Key light
- Fill light
- Backlight
Key light
The key light is your main light source. It’s used in front of your subject to highlight its features, usually slightly to the right or left. For this reason, the key light takes the lead in your lighting set-up. Should you use just one light source for a shoot, then it should be the key light.
Fill light
The fill light functions as the support act to your key light. Accordingly, it shines less brightly than your main light source. Its main purpose is to reduce the contrast from the key light by filling in the shadows. The fill light is positioned on the opposite side of the key light. You can also use a reflector to create a similar effect for your photography.
Backlight
The backlight features in the background, standing behind the subject and directly opposite of your leading light. It separates the subject from the background and adds depth to your photography. Because it can create a halo effect around the subject, sometimes called rim light. When taking your photos outside, using the sun as your backlight is ideal.
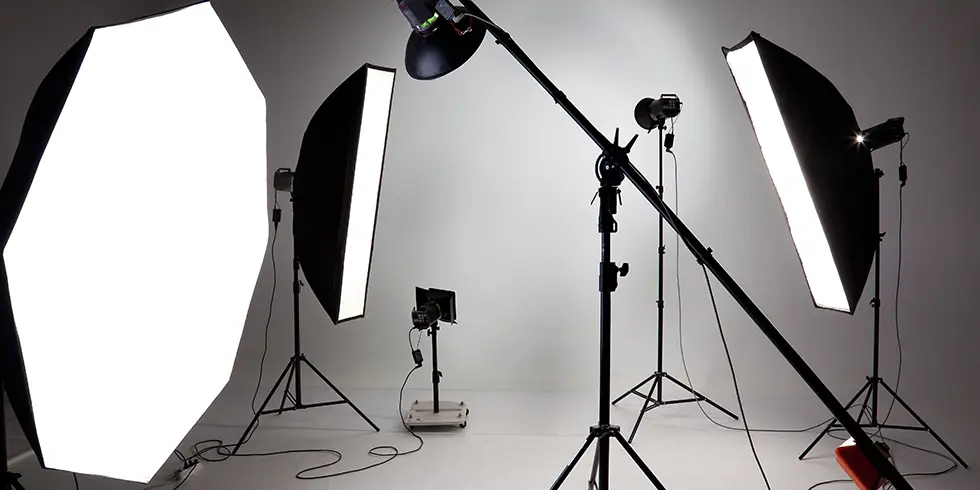
5) Lighting accessories
Lighting accessories are important in photography because they make life easier for photographers and make it possible to vary between different types of light.
Strobes or speedlights
If you want to use flash to light your photography, you can choose between strobes or a speedlight. Strobes are probably the most popular among studio photographers because they are the most powerful light source available. Take into account that power often correlates with price. Cheaper strobes tend to be significantly less powerful.
Speedlights are more portable, less expensive than strobes, and less powerful. You mount them on your camera for an off-camera flash. Their portability makes speedlights perfect if you don’t work with a permanent studio.
Continuous lights
If you prefer continuous light for your photography, there are also multiple options: LED, fluorescent, or tungsten.
Often LEDs give you the best result. They are versatile, long-lasting, and can change the color to what’s best for your picture.
Fluorescent lights tend to create a blue or green color, which can affect the result of your photography. However, you can solve this problem using compact fluorescent lights (CFL).
A third option is tungsten lights. These shine brighter than LEDs or fluorescent lights, but they’re also not very efficient in terms of energy, are quite fragile, and don’t last very long.
Modifiers
You usually use a modifier for soft and evenly distributed lighting, which is ideal for product photography. You can use umbrellas or softboxes. Both have their advantages. Umbrellas are the more affordable option, but softboxes, available in different shapes, are better at diffusing the light and are better adjustable.
Reflectors
Reflectors are objects with a reflective surface that bounce the light from the primary light source towards the subject of your photograph. Board reflectors are a surrogate for using additional lights for your fill light and backlight, making it an efficient way to adjust the lighting how you want it.
Light stands and mounts
All lighting equipment must be secured on either stands or mounts. Always ensure that a stand can carry the weight of a certain piece of equipment, as some can be a lot heavier than others. To make setting up and adjusting your lighting easier, you might consider using dollies, enabling you to wheel it around, or boom arms, with which you can easily adjust the height and angle.
Background
A background is an important object in studio photography. There’s a lot to choose from, both in color and material. You can use high-quality backdrops with a background stand to support it, but it’s also possible to save money and use a sheet of paper and clamps to hold your background in place.
6) Photography lighting types
There are different types of lighting you can use in photography. To make the most out of your images, you need to know how to differentiate between these types and why you should use one or the other.
Ambient lighting
Ambient light is any light you didn’t set up yourself. It can be natural light from the sun or the moon, but it could also be artificial, such as streetlights or lamps hanging from the ceiling.
As you can imagine, it’s more difficult to adjust ambient light for a shoot than studio lighting. But you can turn it to your advantage, for instance, with how you position your subject. Reflecting the light is also an option for a more even distribution and essentially using it as a fill light. Use a bounce board or a sheet of paper to reflect the light.
For product photography, ambient light is generally not ideal for pack shots, but it’s perfect for setting the mood in lifestyle shots, where the setting is almost as important as the product.
Diffused lighting
Diffused lighting is filtered in some way to create a softer light that is more evenly distributed. It’s popular for portrait photography and product photography because the diffused light ensures the subject is well-lit throughout with soft shadows if any at all.
Flat lighting
Flat lighting is when the photo is lit directly from the front without any contrast or depth. This is often not desirable for photography, except close-ups, because it makes imperfections less visible. You can counter flat light by reflecting your key light or using a backlight.
Broad lighting and short lighting
Broad and short lighting is primarily used in portrait photography. In both cases, you focus on the subject’s face. However, broad lighting focuses on the part of the face nearest to the camera, which makes the face wider, whereas short lighting focuses on the part furthest away, making the face look smaller.
Hard light and soft light
Hard light and soft light are two very different types of lighting. Hard light comes from a single source that generally shines bright and focused on the subject, which results in strong contrast and sharp shadows. On the other hand, soft light uses a larger light source, often diffused, which creates soft, fuzzy edges and subtle shadows or no shadows at all.
Soft light is usually preferable for product photography over hard light because it hits the product more evenly. However, which type you choose ultimately depends on the style of your photograph.
7) Perfecting your product photography: consider professional editing
Even with the best lighting set-up your pictures are never instantly perfect. Some editing is always needed. If you regularly photograph products and you need to optimize it for use in e-commerce, then Bright River is your guarantee for results.
We are used to editing product images in many different ways on a vast scale. We know exactly what is needed for e-commerce and have the capacity and experience to successfully service the editing needs of both Fortune 500 companies and smaller e-commerce businesses.
Do you also want to fully focus on your photography by outsourcing your post-production? Get in touch. Either directly create a free account to start uploading your images, or request a quote if you need more than 2500 images edited per year.